
I thought I spoke English until a bus driver in Cork threw me...
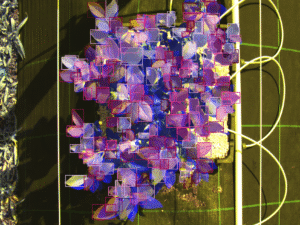
PhenoSelect: Training a Neural Network Because I Refuse to Click on 100,000 Leaves
An introduction to PhenoSelect, an open-source deep learning pipeline designed to automate leaf...
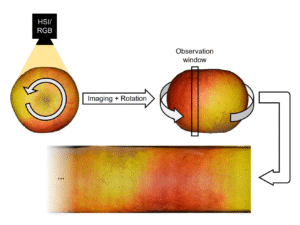
How to Image a Whole Apple
A deep dive into the process of building a custom hardware and software...
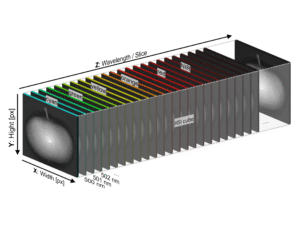
Beyond the Naked Eye OR Why More Data Isn’t Always Better
An exploration into how hyperspectral imaging and machine learning can be used to...