
An exploration into how hyperspectral imaging and machine learning can be used to...
How do you take a single, flat picture of a round object like an apple without losing information to shadows or missing entire sides? This article showcases the journey of solving this exact problem. We’ll explore the specific hurdles of 3D imaging and detail the design and creation of a custom “Apple Rotator Device,” the programming that brings it to life, and the automated image processing pipeline that makes the data usable.
The Hurdles: Why Imaging a Sphere is So Hard
Capturing a complete and accurate image of a 3D object for scientific analysis presents several significant technical challenges. Before building a solution, it was crucial to define the problems that needed to be solved:
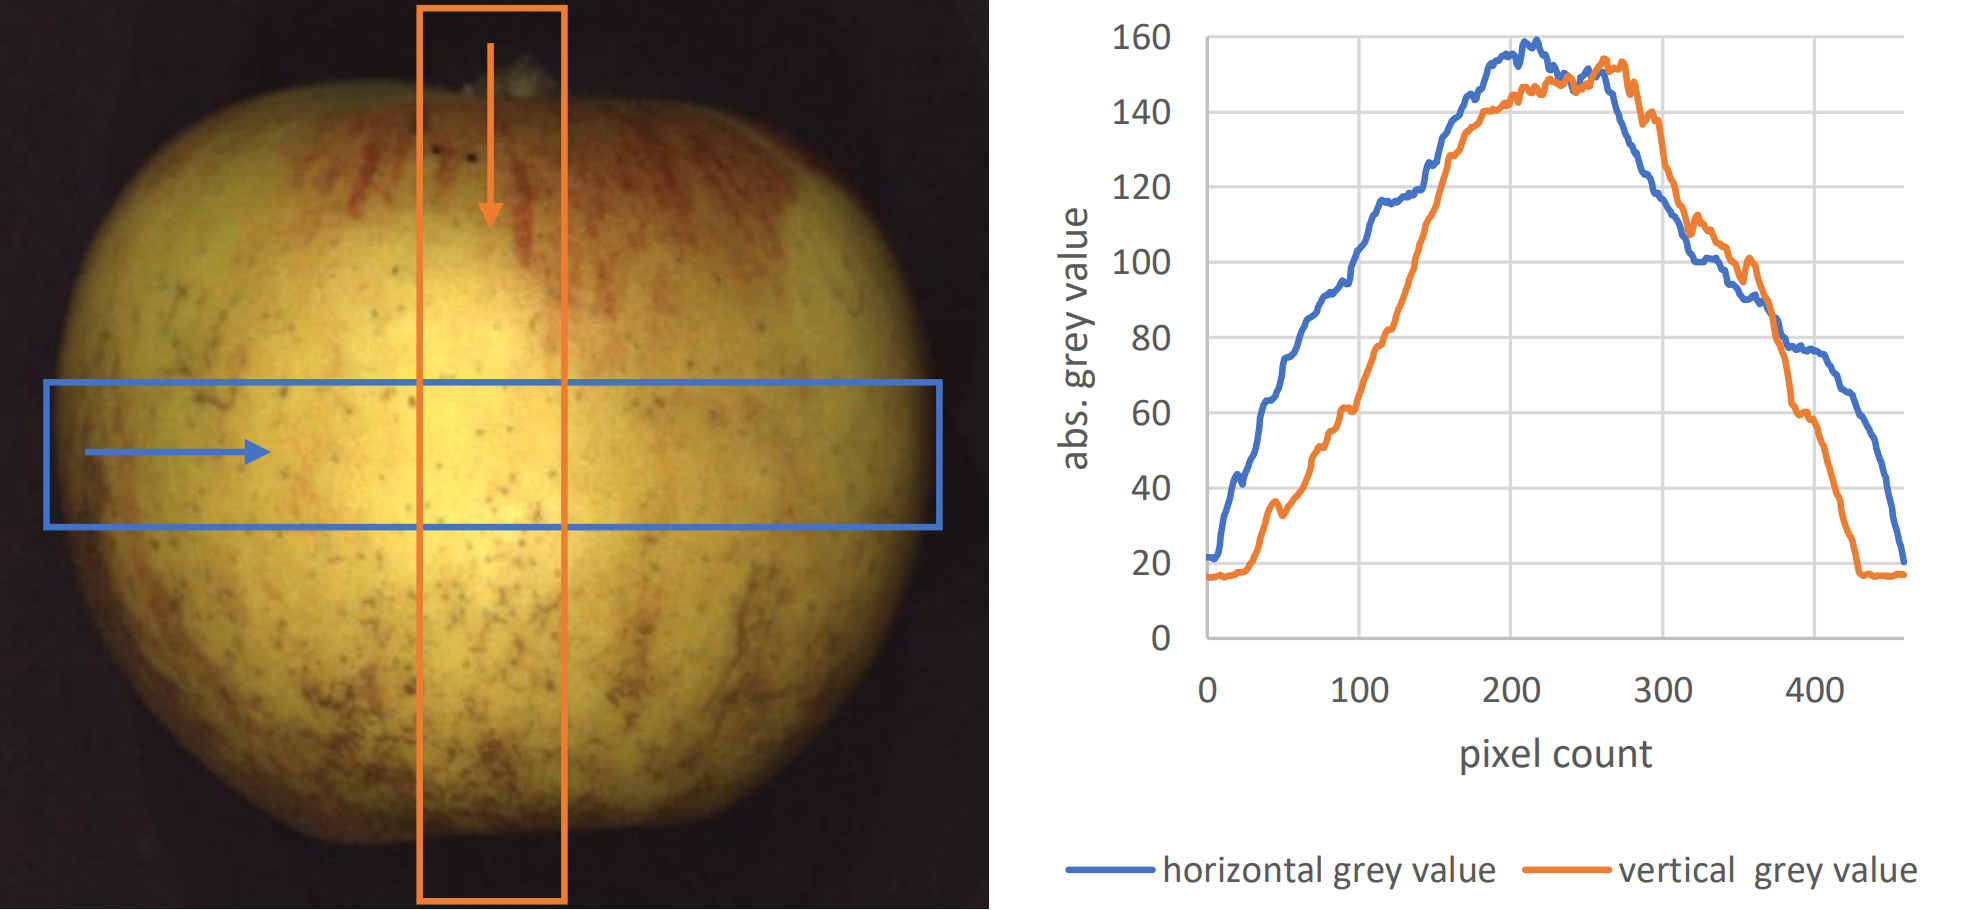
- The Shading Problem: When you illuminate a spherical object, you naturally run into a shading issue described by Lambert’s cosine law. The surface is brightest where light hits it directly (the center) and gets progressively darker towards the edges. This is a major problem for image analysis, as software can’t easily distinguish this natural shading from actual dark features on the surface, like blemishes or color variations.
- The Incomplete View: A single photo can only ever capture, at most, half of a sphere. To analyze the entire surface of an apple, it’s necessary to capture it from all sides.
- The Need for Precision: The solution to these problems is to capture many images in small, precise increments as the object rotates, and then digitally “unroll” them. However, for this to work, the rotation must be perfectly consistent and repeatable. Any slip or inconsistent step would make it impossible to seamlessly stitch the images together later. This requirement for high precision ruled out manual rotation and demanded a custom-built, automated solution.
The Solution, Part 1: Custom Hardware for Precision Rotation
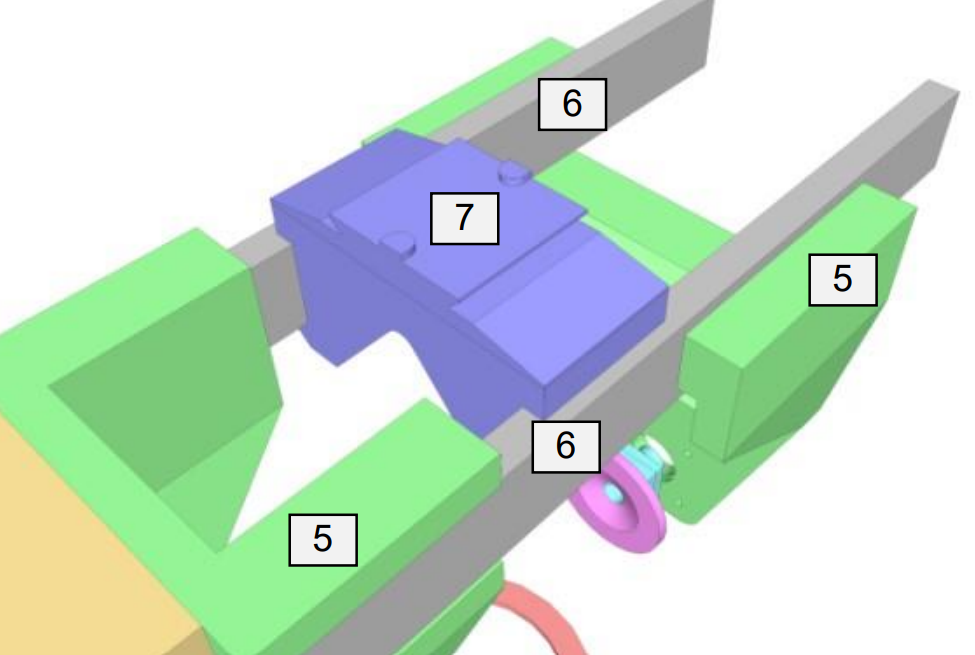
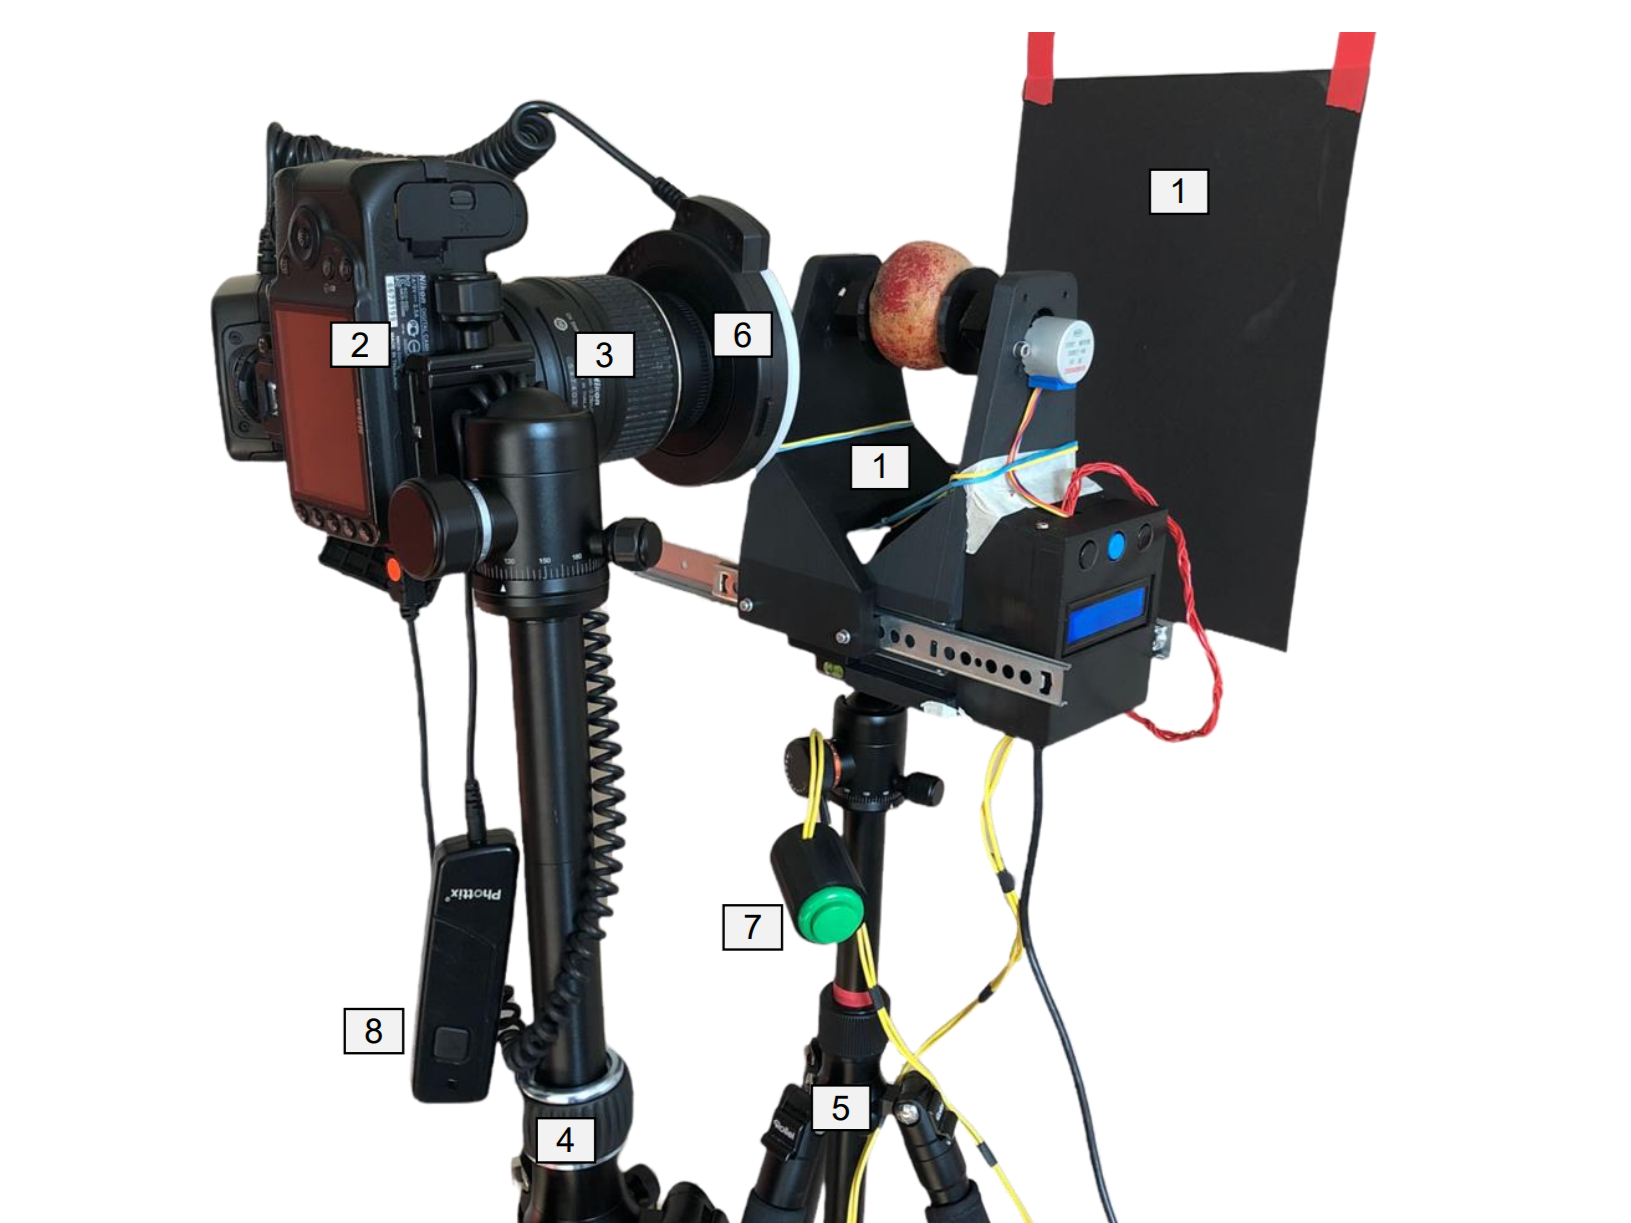
To overcome these hurdles, I designed, built, and programmed a custom Apple Rotator Device (ARD). This device was engineered from the ground up to provide the precision and stability required for the imaging process.
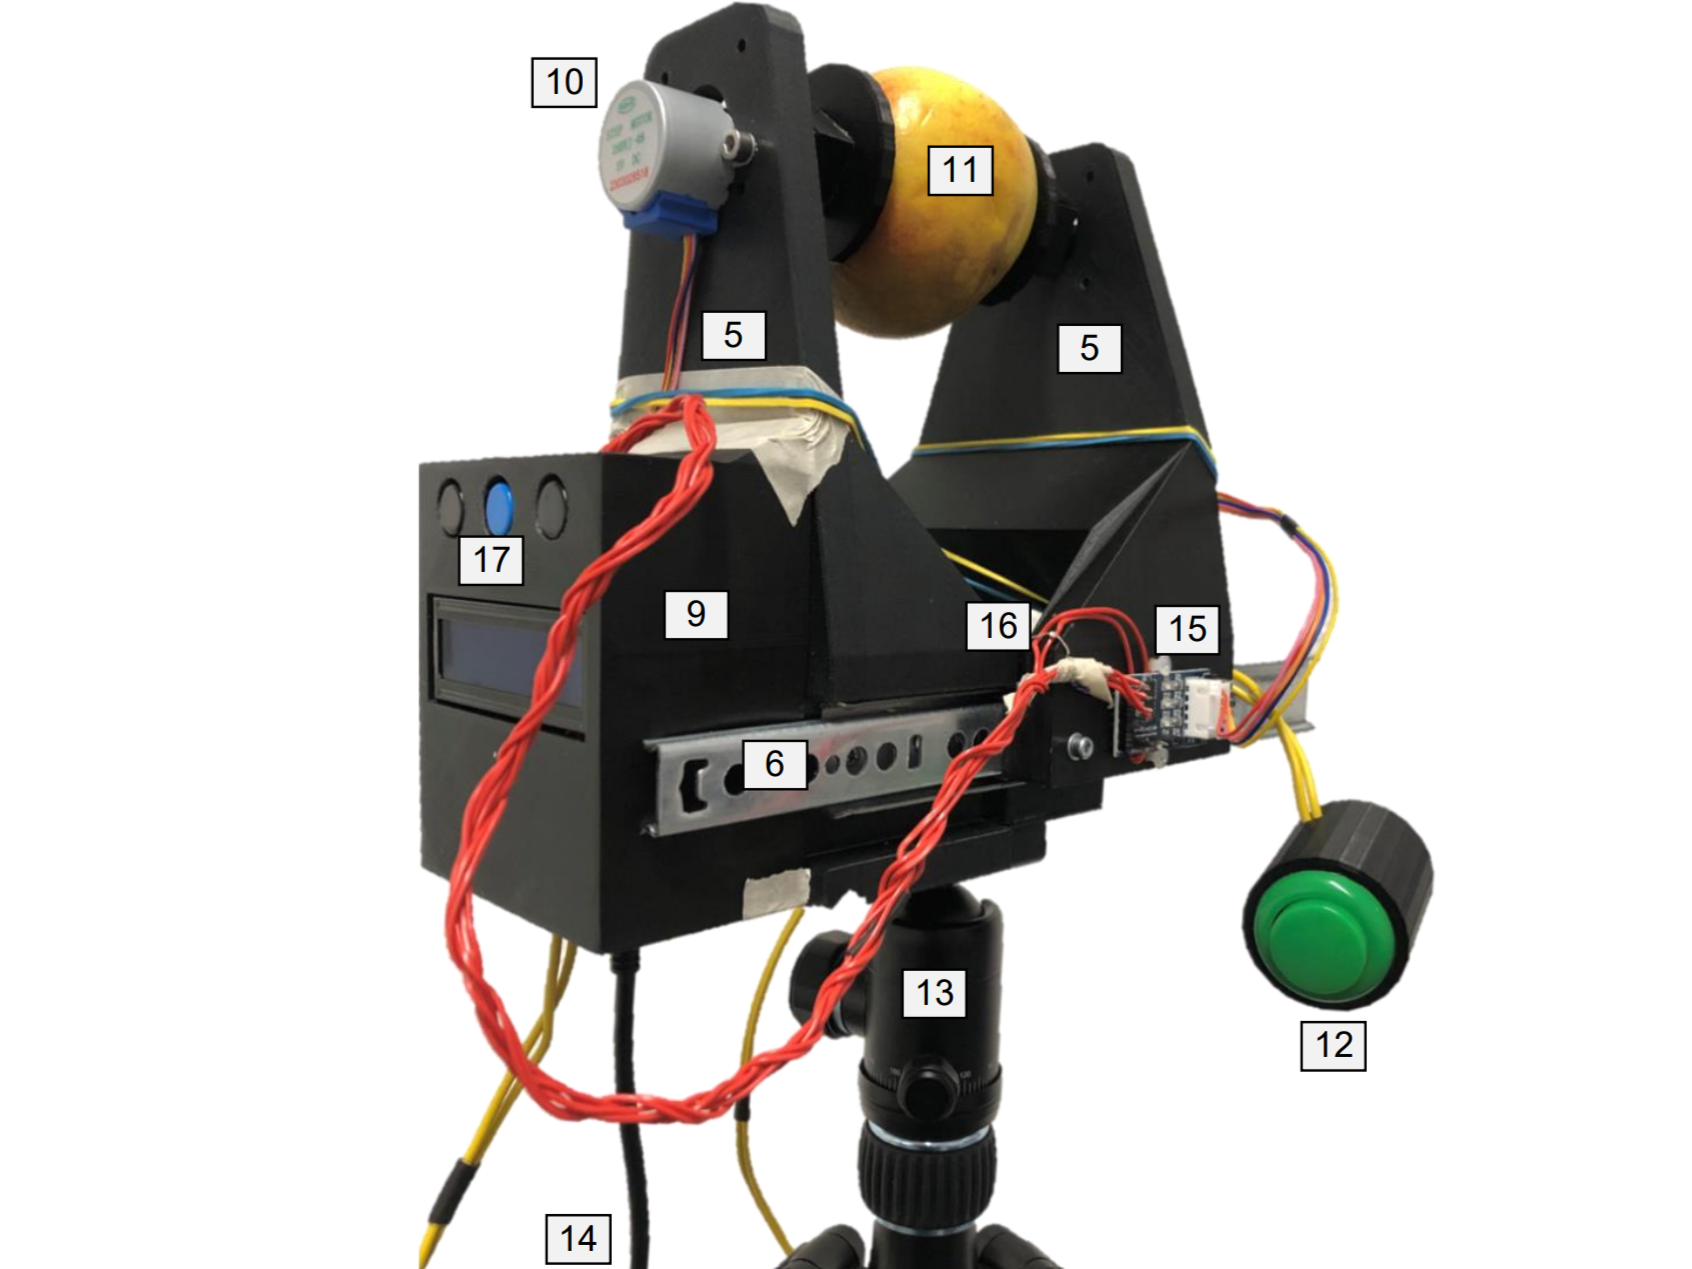
The development process started in Computer-Aided Design (CAD) software, where every component was modeled to ensure a perfect fit and function. The parts were then manufactured using a 3D printer with black PLA to minimize unwanted light reflections during imaging. The final device uses a secure clamping mechanism to hold an apple firmly between two points, which are driven by two stepper motors (resolution: 0.176°).
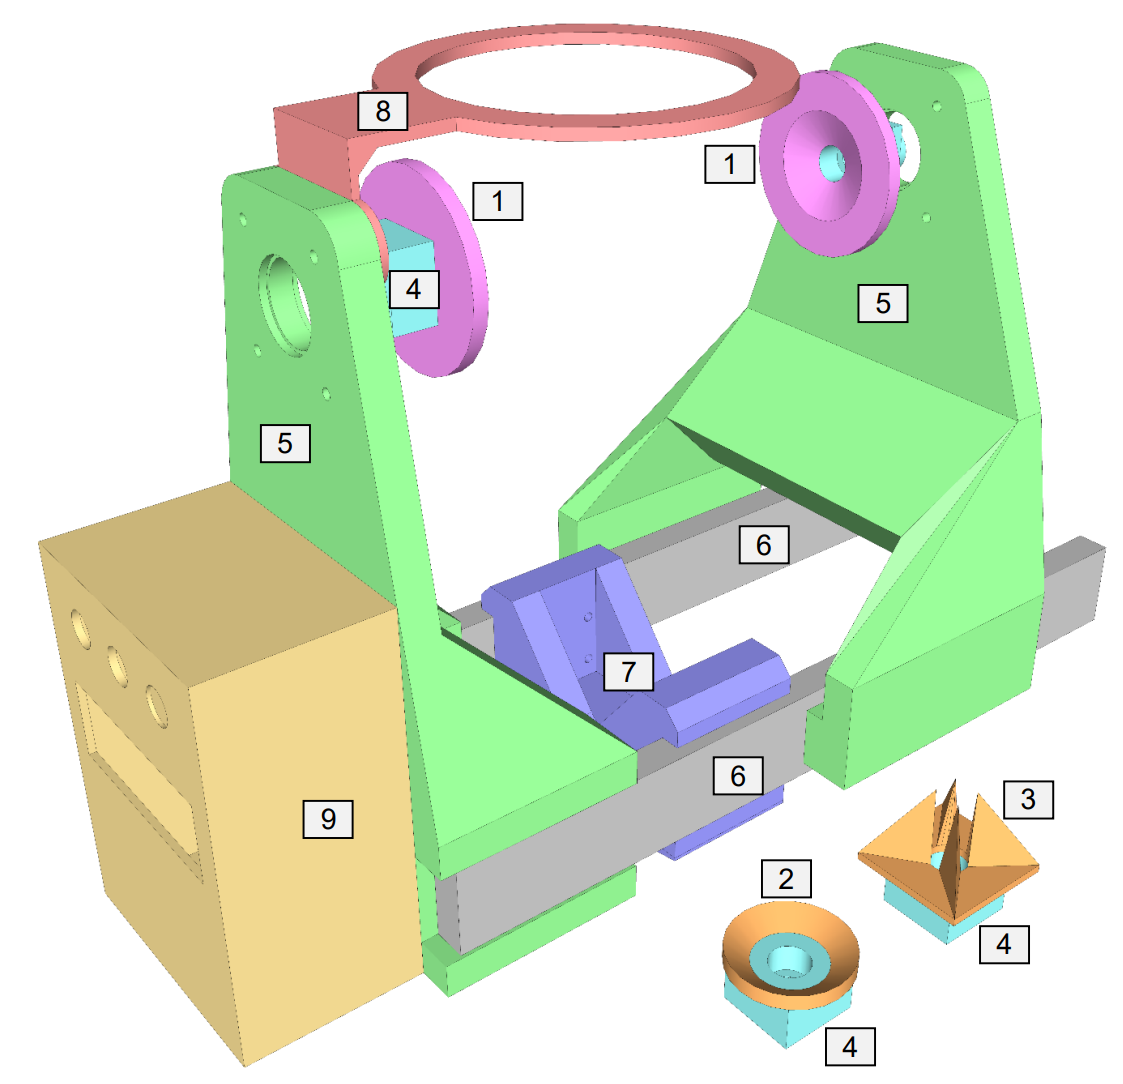
The “brain” of the ARD is an Arduino Nano microcontroller, which I programmed to manage its operations. A key challenge was synchronizing the device with the hyperspectral imaging system, which offered no simple way to signal when it was taking a picture. To solve this, I integrated a light sensor as a workaround. Each time the HSI system turned on its lights to capture an image, the sensor would detect the change in brightness and signal the microcontroller to initiate the next rotation step. This created a perfect, hands-free synchronization without any direct electronic communication with the camera system.
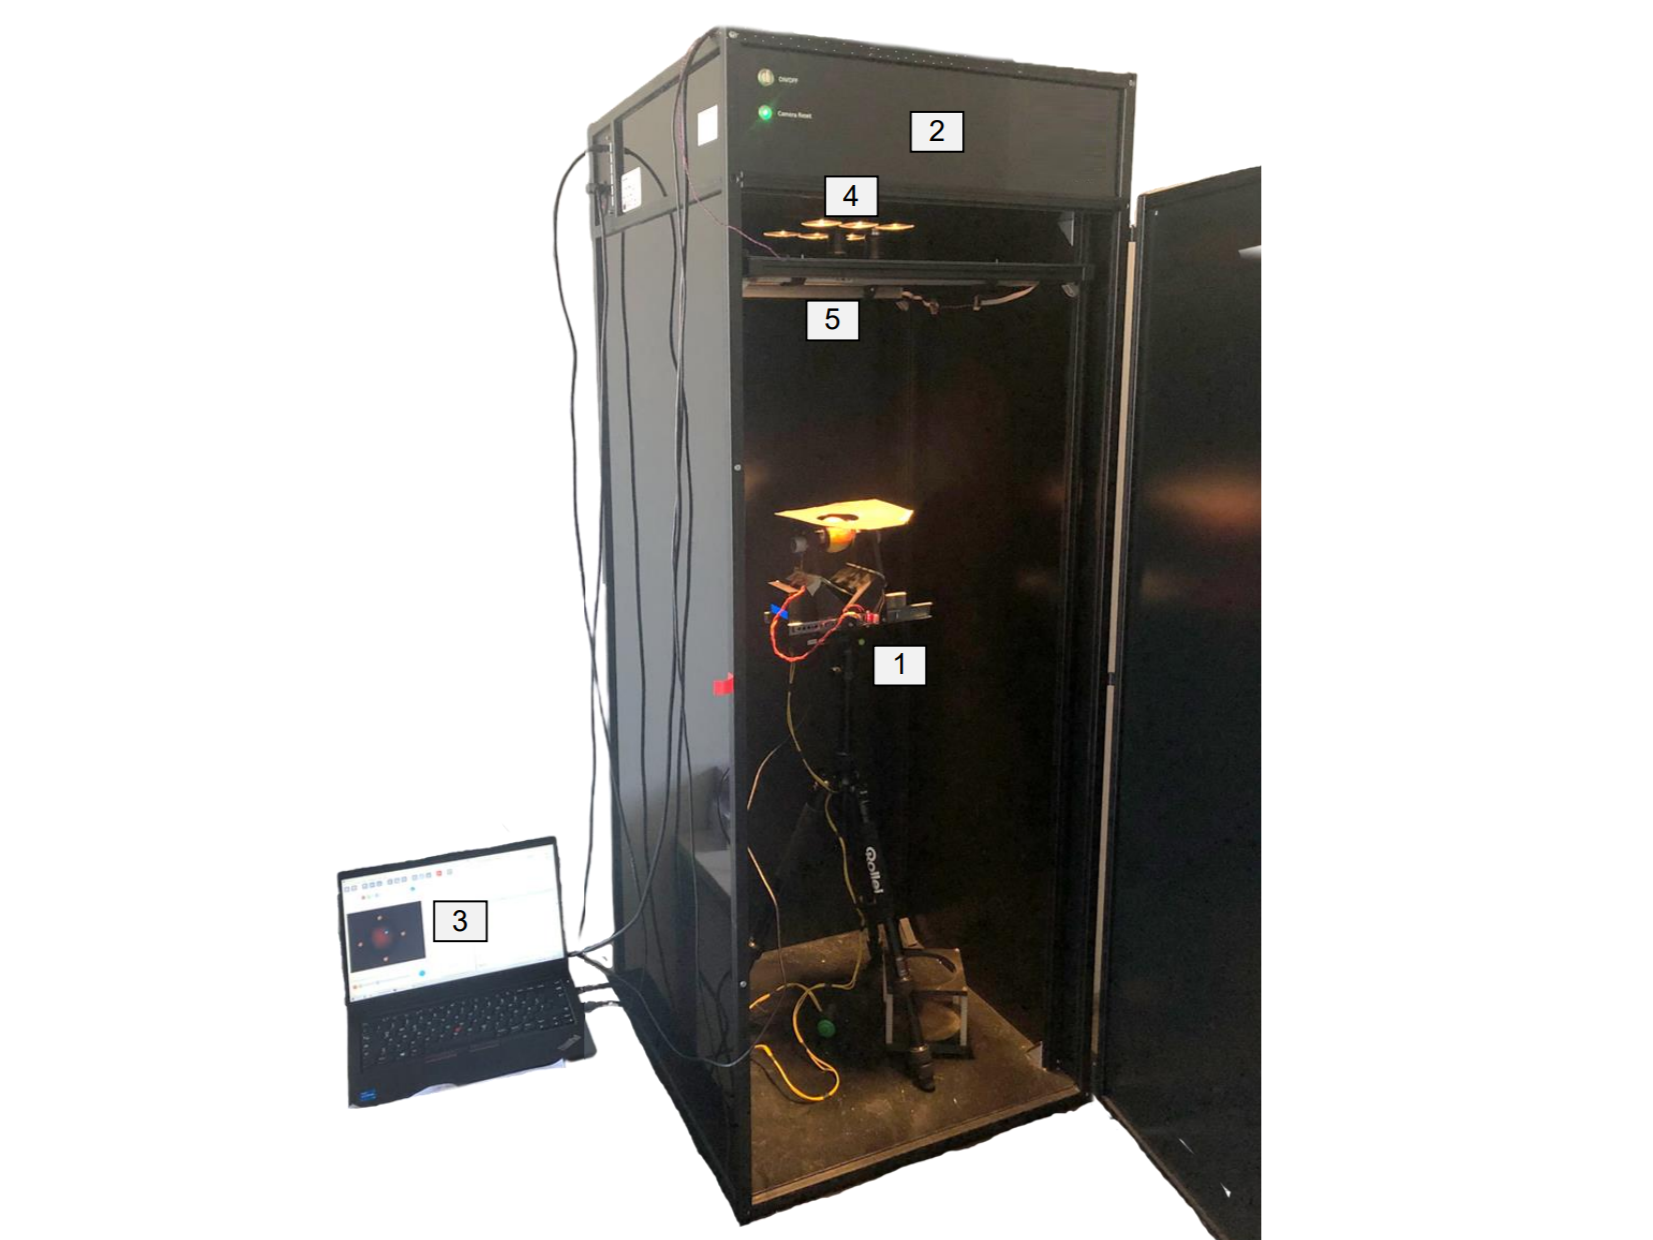
This versatile ARD was used in two distinct imaging setups: one inside a Hyperspectral Imaging (HSI) system and another with a high-resolution DSLR camera for standard RGB imaging, demonstrating its adaptability to different technical requirements.
The Solution, Part 2: An Automated Post-Processing Pipeline
Capturing the data is only half the battle. The hundreds of images generated from a single rotating apple are initially just a sequence of separate files. To transform them into a single, usable dataset, I developed a fully automated post-processing pipeline using a custom script in Fiji (always using Python can be boring 😉 ), a powerful open-source image analysis software.
This script acts as the crucial bridge between the raw images from the ARD and the final, analyzable data. It performs several key steps:
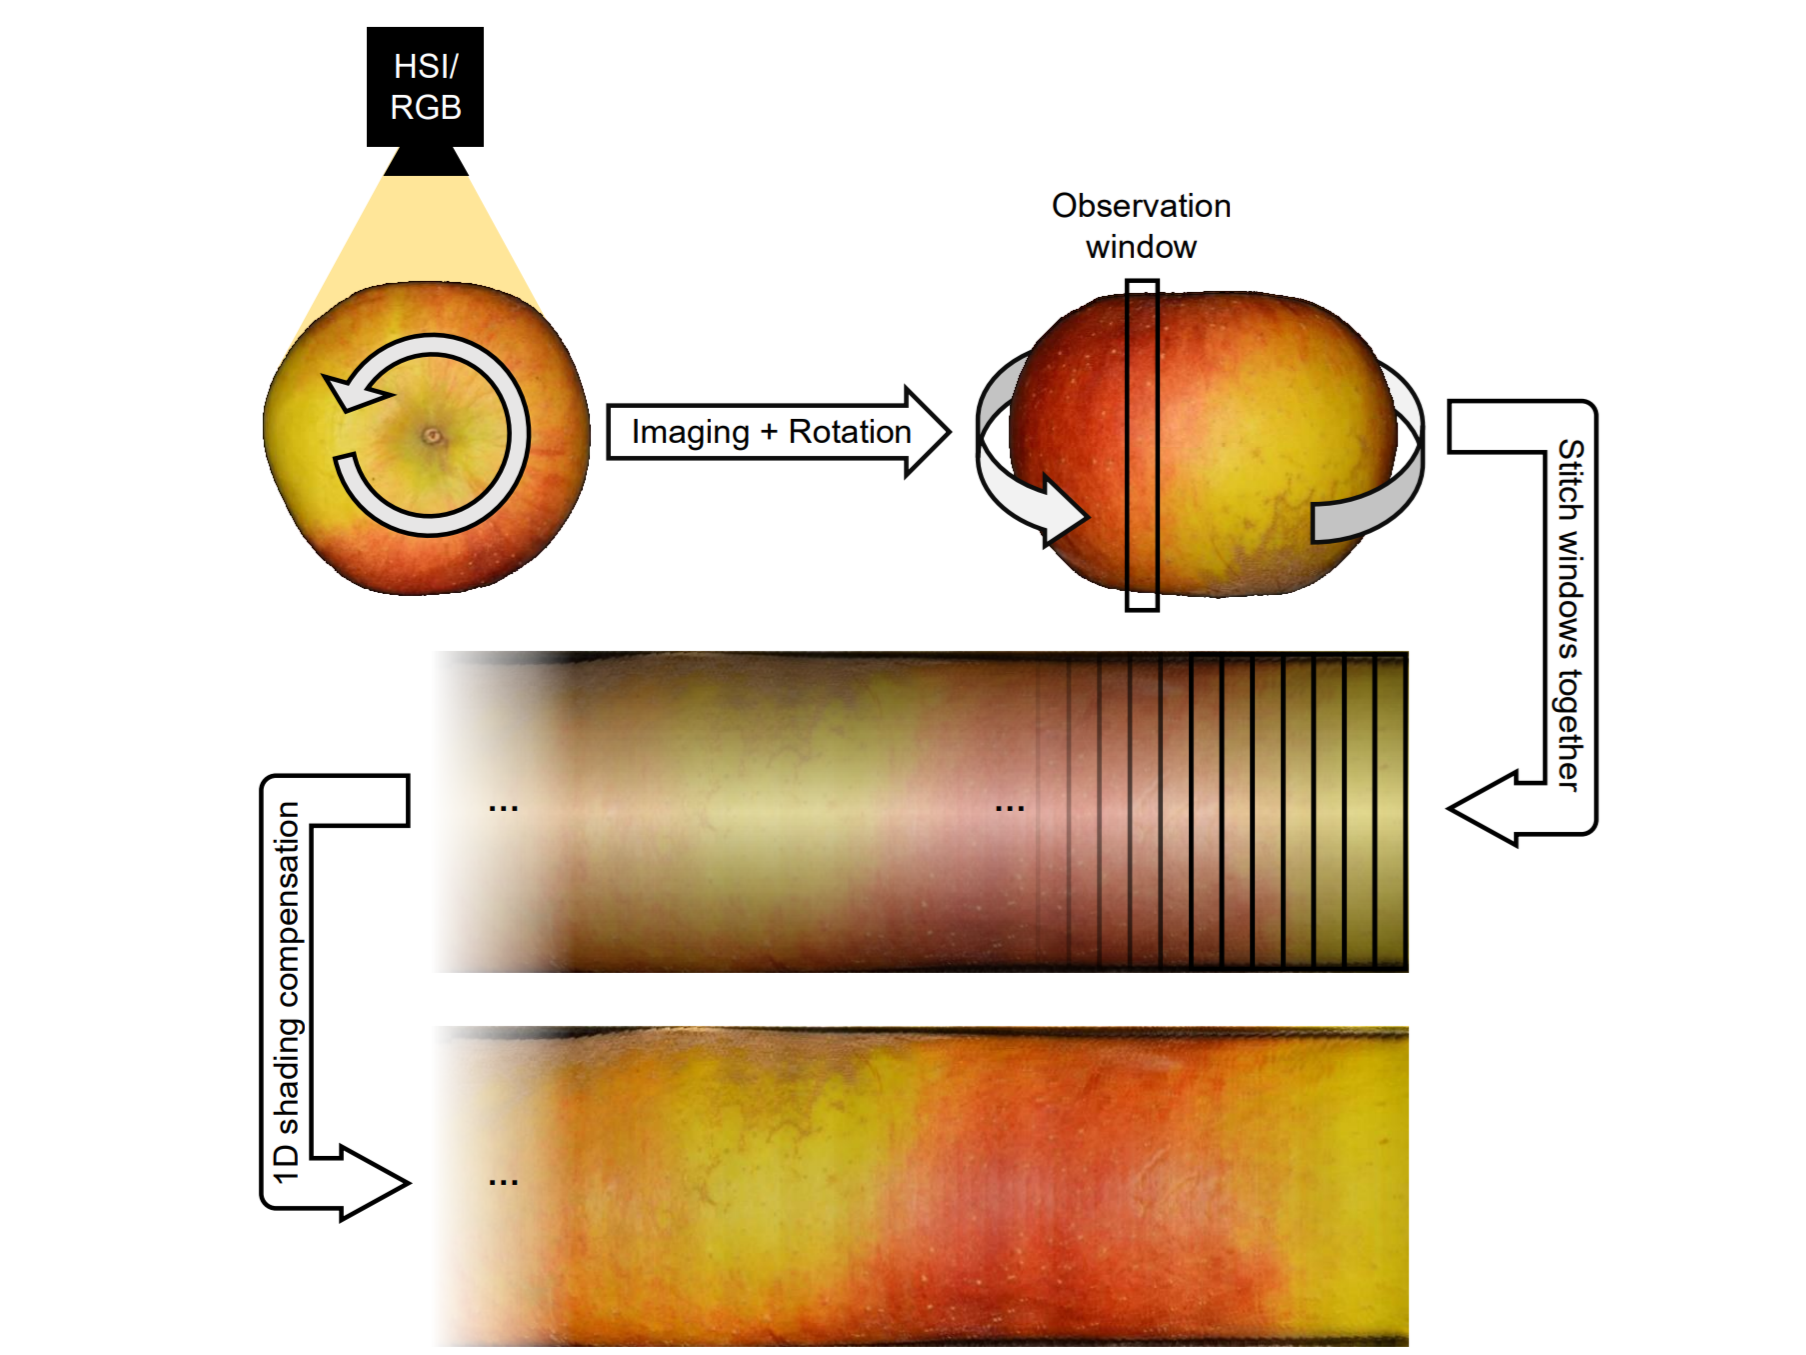
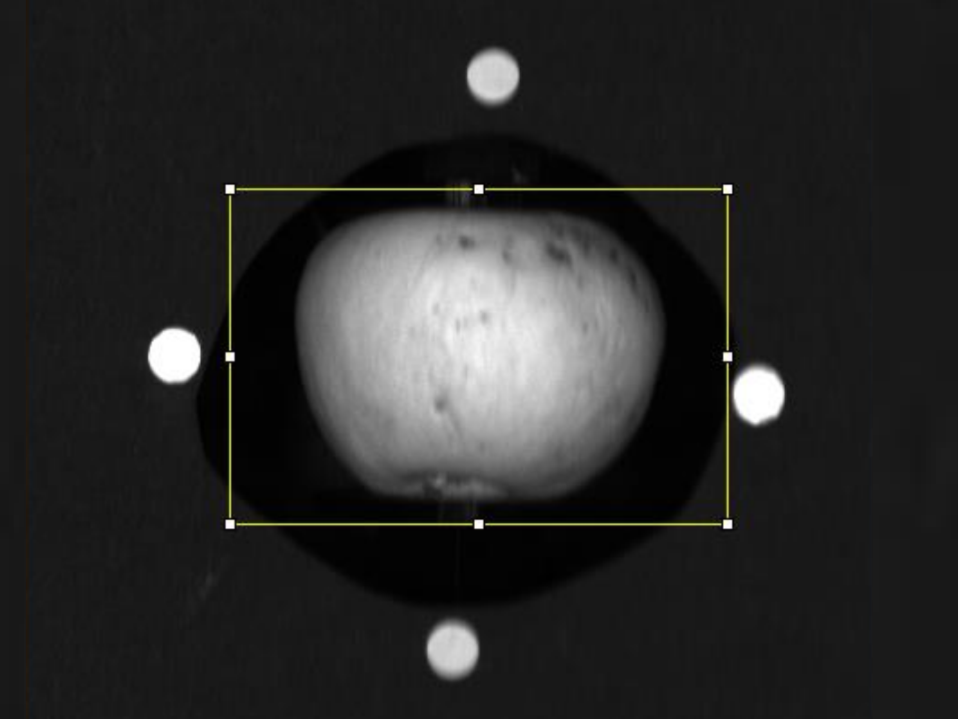
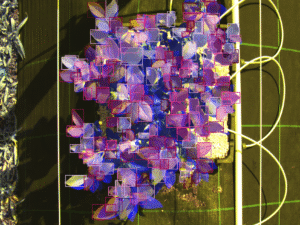
- Ingest & Align: The script first loads all the images. In the real world, minor mechanical vibrations or camera shifts can cause the apple to be slightly off-center from one image to the next. To fix this, I placed four white tracking dots in the background. The script automatically detects these dots in every image and realigns it, ensuring every frame is perfectly centered. This step is critical for creating a seamless final image.
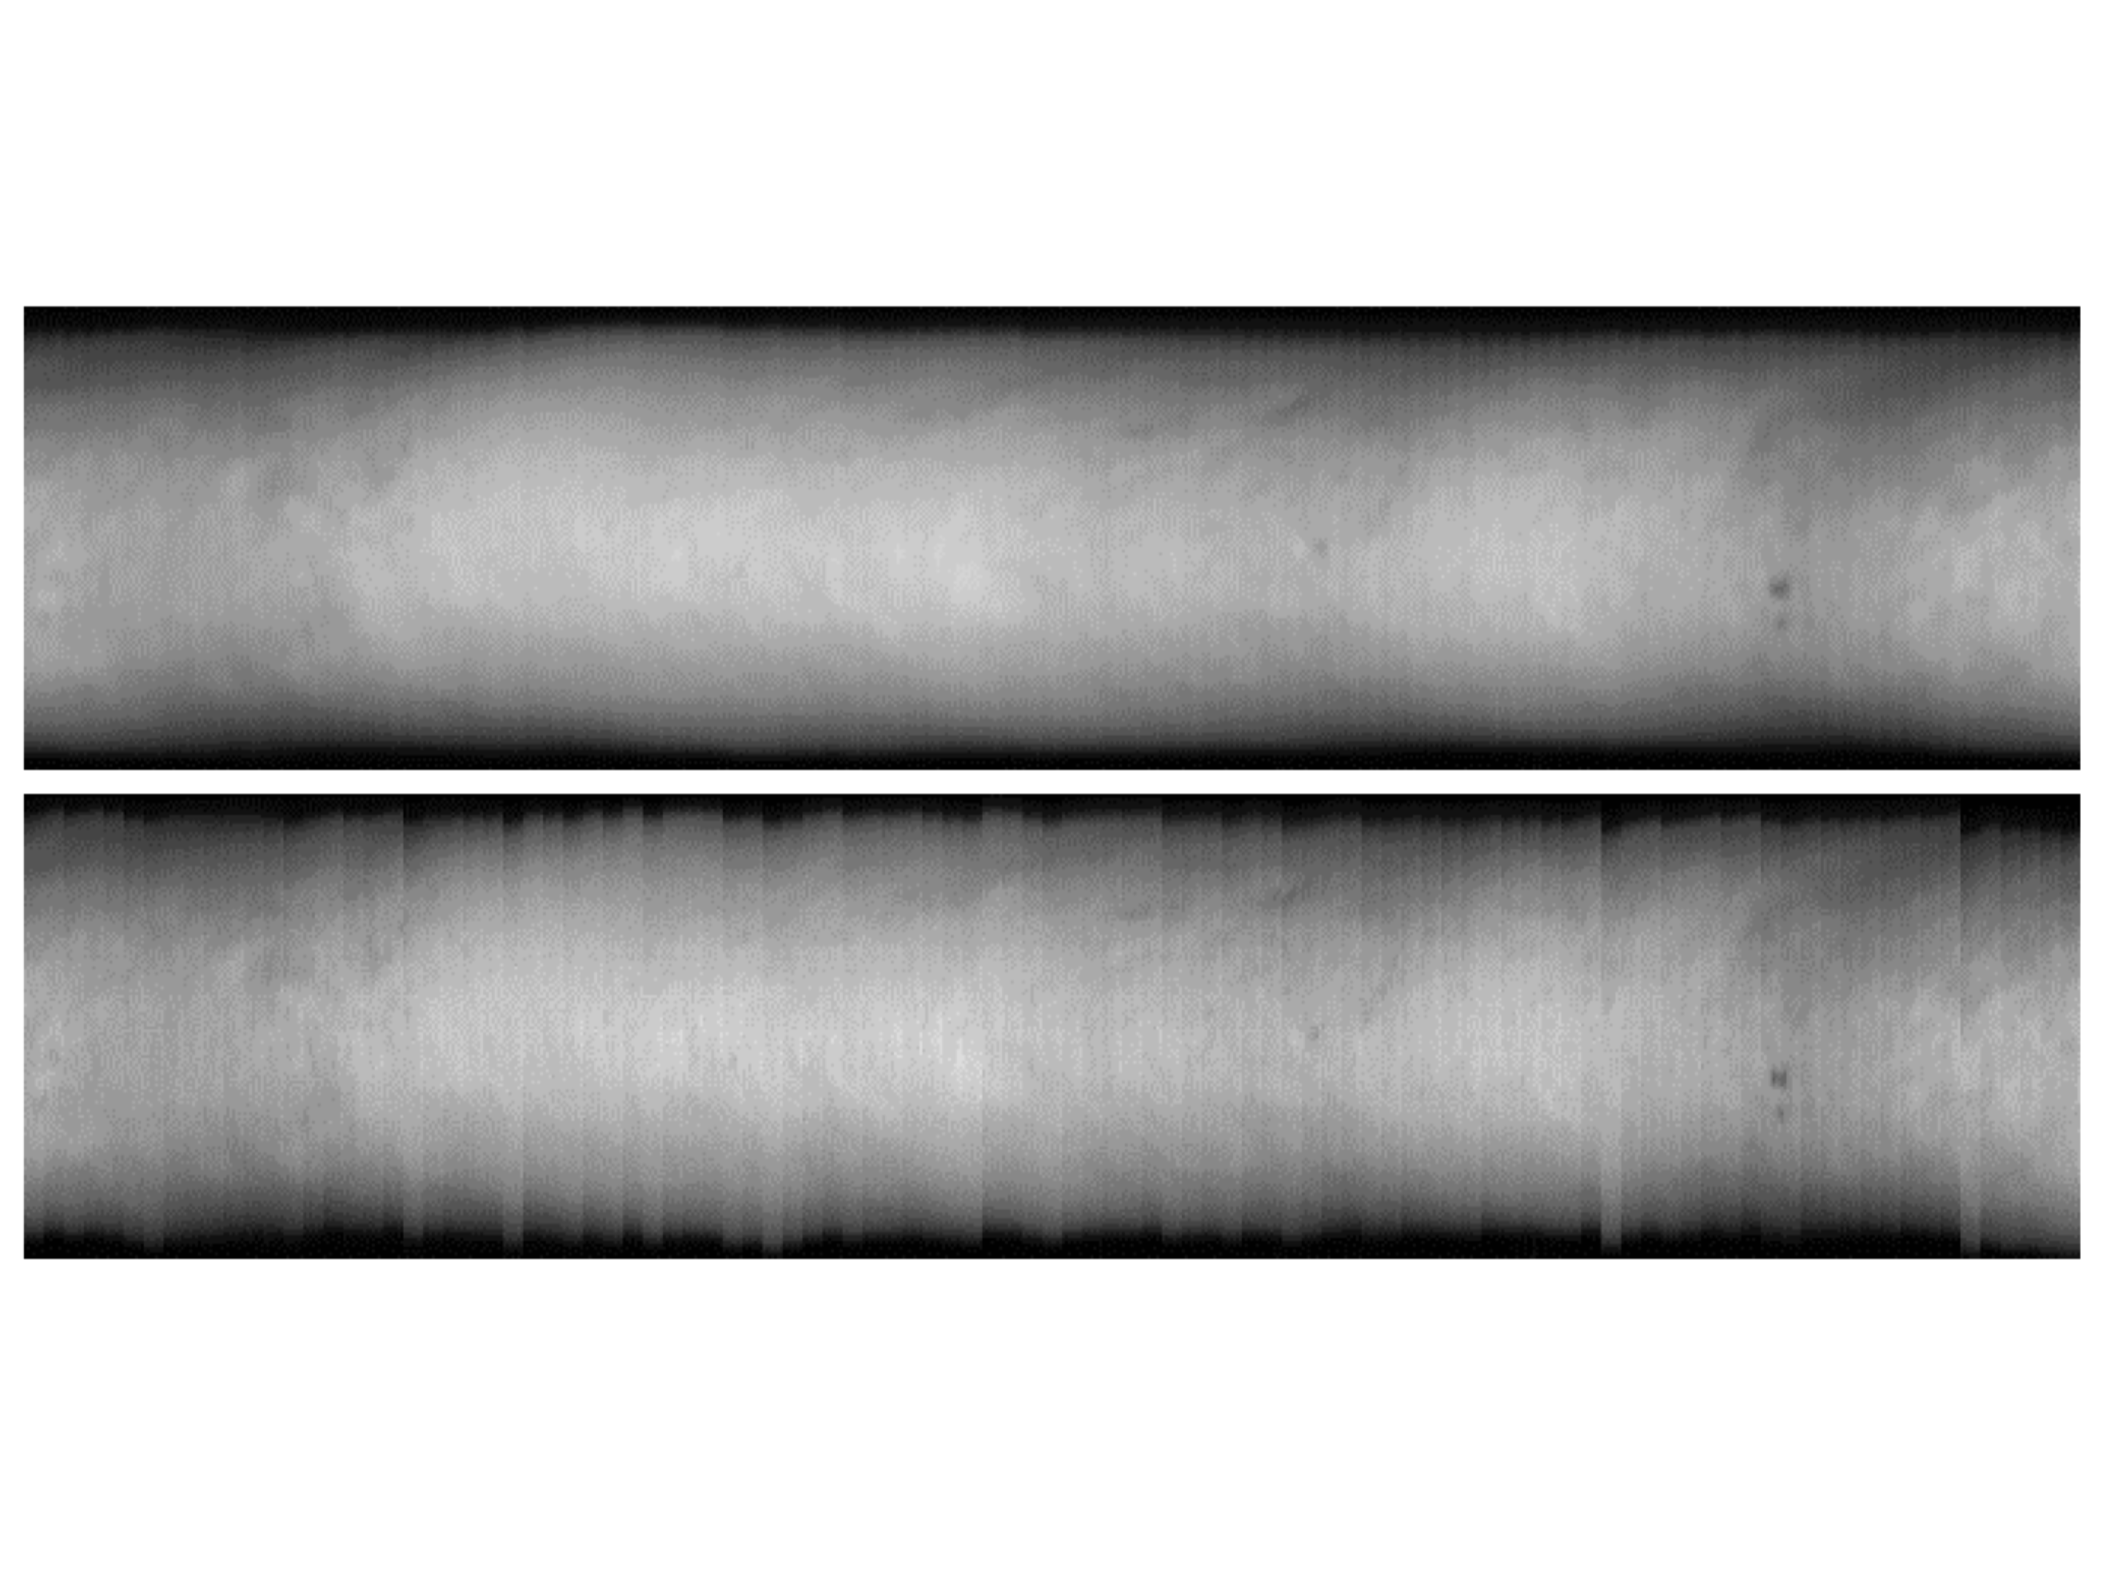
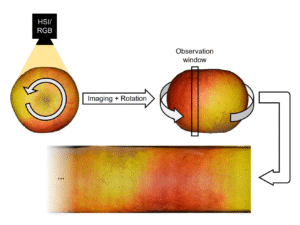
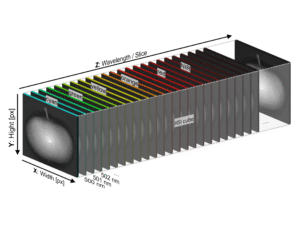
- Digital Unrolling: Next, the script performs the “rollout.” It takes a narrow vertical slice from the center of each consecutive image and stitches them together in order. This process digitally unfolds the apple’s 3D surface into a single, continuous 2D image, much like unrolling a map of the globe.
- Shading Correction: Finally, to solve the shading problem from Lambert’s law, the script performs a compensation step. The “unrolled” apple image is digitally divided by a reference image of a perfectly uniform white cylinder taken under the exact same lighting conditions. This cancels out the shading effect, resulting in an image with remarkably uniform brightness across the entire surface.
This integrated system—from the custom-designed hardware of the ARD to the intelligent software of the processing pipeline—provided a robust, end-to-end solution. It successfully transformed a complex 3D imaging problem into a manageable and accurate 2D dataset, creating the essential foundation for advanced analysis like applying machine learning algorithms.


Why You Should Go Abroad in Your Studies
I thought I spoke English until a bus driver in Cork threw me...
PhenoSelect: Training a Neural Network Because I Refuse to Click on 100,000 Leaves
An introduction to PhenoSelect, an open-source deep learning pipeline designed to automate leaf...
How to Image a Whole Apple
A deep dive into the process of building a custom hardware and software...
Beyond the Naked Eye OR Why More Data Isn’t Always Better
An exploration into how hyperspectral imaging and machine learning can be used to...